はじめに
Unity の「UIElements」を使用することで
CSS ライクなエディタ拡張を実装できます
検証環境
- Unity 2017.3.0f3
サンプル1
.horizontalContainer {
    margin-left: 50;
    margin-top: 50;
    margin-right: 50;
    margin-bottom: 50;
    flex-direction: row;
}

#boxesContainer {
    padding-left: 10;
    padding-top: 10;
    padding-right: 10;
    padding-bottom: 10;
    background-color: rgb(128, 128, 128);
    align-self: flex-start;
}

#boxesContainer > VisualElement {
    width: 100;
    height: 100;
}

#2Plus1Container {
    height: 100;
    align-self: flex-start;
}

#large {
    flex: 0.7;
    background-color: rgb(255, 0, 0);
}

#small {
    flex: 0.3;
    background-color: rgb(0, 0, 255);
}

#wrapContainer {
    flex-wrap: wrap;
}

#wrapContainer > VisualElement {
    width: 20;
    height: 20;
    margin-left: 5;
    margin-top: 5;
    margin-right: 5;
    margin-bottom: 5;
    background-color: #0000FF;
}
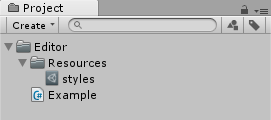
上記のスクリプトを「styles.uss」というファイル名で
Unity プロジェクトの「Editor/Resources」フォルダに追加します
using UnityEditor;
using UnityEditor.Experimental.UIElements;
using UnityEngine;
using UnityEngine.Experimental.UIElements;

public class Example : EditorWindow
{
    [MenuItem( "Tools/Example" )]
    private static void Init()
    {
        GetWindow<Example>();
    }

    private void OnEnable()
    {
        var root = this.GetRootVisualContainer();
        root.AddStyleSheetPath( "styles" );

        var boxes = new VisualContainer { name = "boxesContainer" };
        boxes.AddToClassList( "horizontalContainer" );
        boxes.Add( new VisualElement { style = { backgroundColor = Color.blue } } );
        boxes.Add( new VisualElement { style = { backgroundColor = Color.green } } );
        boxes.Add( new VisualElement { style = { backgroundColor = Color.yellow } } );
        root.Add( boxes );

        var twoPlusOneContainer = new VisualContainer { name = "2Plus1Container" };
        twoPlusOneContainer.AddToClassList( "horizontalContainer" );
        twoPlusOneContainer.Add( new VisualElement { name = "large" } );
        twoPlusOneContainer.Add( new VisualElement { name = "small" } );
        root.Add( twoPlusOneContainer );

        var wrapContainer = new VisualContainer { name = "wrapContainer" };
        wrapContainer.AddToClassList( "horizontalContainer" );
        root.Add( wrapContainer );

        for ( int i = 0; i < 20; i++ )
        {
            wrapContainer.Add( new VisualElement() );
        }
    }
}
そして、このスクリプトを「Editor」フォルダに追加します
これで、Unity メニューの「Tools>Example」を選択すると

このようなウィンドウが表示されます
サンプル2
using UnityEditor;
using UnityEditor.Experimental.UIElements;
using UnityEngine;
using UnityEngine.Experimental.UIElements;

public class Example : EditorWindow
{
    [MenuItem( "Tools/Example" )]
    private static void Init()
    {
        GetWindow<Example>();
    }

    private void OnEnable()
    {
        var root = this.GetRootVisualContainer();
        root.AddManipulator( new MouseEventLogger() );
        root.Add( new VisualElement { style = { backgroundColor = Color.red }, text = "Click me" } );
    }

    private class MouseEventLogger : Manipulator
    {
        protected override void RegisterCallbacksOnTarget()
        {
            target.RegisterCallback<MouseUpEvent>( OnMouseUpEvent );
            target.RegisterCallback<MouseDownEvent>( OnMouseDownEvent );
            target.RegisterCallback<MouseUpEvent>( OnMouseUpEvent, Capture.Capture );
            target.RegisterCallback<MouseDownEvent>( OnMouseDownEvent, Capture.Capture );
        }

        protected override void UnregisterCallbacksFromTarget()
        {
            target.UnregisterCallback<MouseUpEvent>( OnMouseUpEvent );
            target.UnregisterCallback<MouseDownEvent>( OnMouseDownEvent );
            target.UnregisterCallback<MouseUpEvent>( OnMouseUpEvent, Capture.Capture );
            target.UnregisterCallback<MouseDownEvent>( OnMouseDownEvent, Capture.Capture );
        }

        void OnMouseUpEvent( MouseEventBase<MouseUpEvent> evt )
        {
            Debug.Log( "Receiving " + evt + " in " + evt.propagationPhase + " for target " + evt.target );
        }

        void OnMouseDownEvent( MouseEventBase<MouseDownEvent> evt )
        {
            Debug.Log( "Receiving " + evt + " in " + evt.propagationPhase + " for target " + evt.target );
        }
    }
}
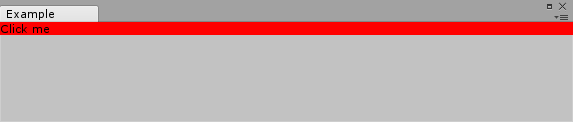
このようなスクリプトでボタンが押されたかどうかを判定できます
- もっと読む
コメントを書く