はじめに
⭐️Unity Pixel Art Tips 2018⭐️
— Davitsu 🏮 (@Davitsu) 2018年1月25日
Are you working on a Unity project, but your Pixel Art sprites look blurry and distorted? Don't worry, follow this little tutorial and those pixels will look BEAUTIFUL!
(RT to save a dev life)#unity #pixelart #gamedev pic.twitter.com/wkaXP7skJt
上記のツイートで、ドット絵がぼやけてしまう問題を解決する方法が紹介されており
とても参考になったので、こちらに方法を書き残しておこうと思います
検証環境
- Unity 2017.3.0f3
対策その1
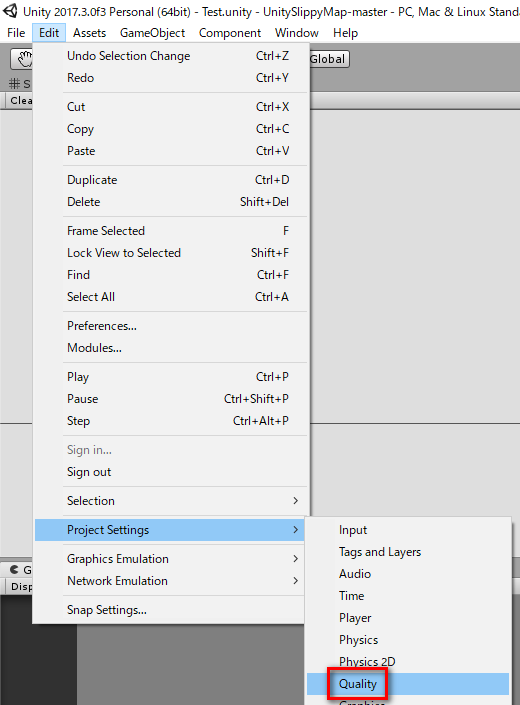
Unity メニューの「Edit>Project Settings>Quality」を選択して

「Anti Aliasing」を「Disabled」に変更します
対策その2

Project ビューでテクスチャを選択して
「Filter Mode」を「Point (no filter)」に、
「Compression」を「None」に変更します
対策その3
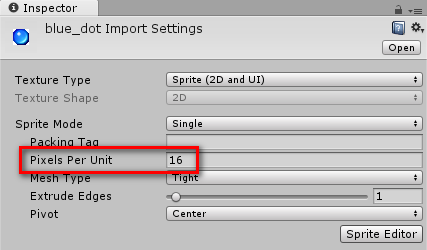
Project ビューでテクスチャを選択して「Poxels Per Unit」を設定します
例えば、ドット絵のサイズが 16 x 16 の場合は「16」を設定することがオススメです
対策その4
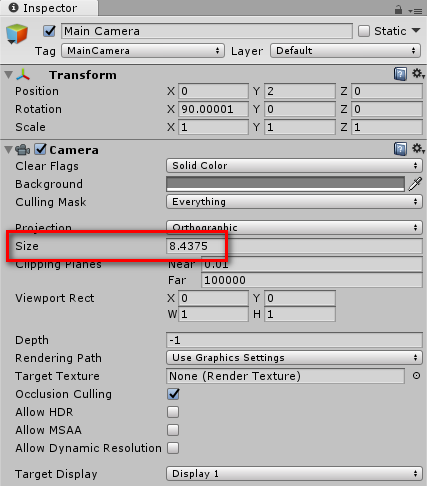
Hierarchy でカメラを選択して「Size」を設定します
「Size」に入力する値は「ゲーム画面の縦幅 / ドット絵のサイズ / 2」にします
例えば、ゲーム画面のサイズが 480 x 270 で、ドット絵のサイズが 16 x 16 の場合は
「270 / 16 / 2 = 8.4375」なので、「8.4375」を設定します
対策その5

ドット絵を動かした場合、通常は上記のように滑らかに動きますが、
using UnityEngine;

public class Example : MonoBehaviour
{
    private void LateUpdate()
    {
        var ppu = 16; // ドット絵のサイズ
        var parent = transform.parent;
        var px = parent.position.x;
        var py = parent.position.y;
        var position = transform.localPosition;
        position.x = ( Mathf.Round( px * ppu ) / ppu ) - px;
        position.y = ( Mathf.Round( py * ppu ) / ppu ) - py;
        transform.localPosition = position;
    }
}
このようなスクリプトを作成して使用することで
上記のようにドット単位で動かせるようになります
前述したスクリプトを使用する場合は
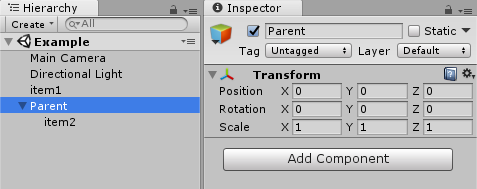
空のゲームオブジェクトを親オブジェクトにして、

スプライトはそのオブジェクトの子供にして、
このスプライトに前述したスクリプトをアタッチします
また、実際にゲームで操作するのは親オブジェクトの方になります
以上が、ドット絵がぼやけてしまう問題を解決して綺麗に表示する方法の紹介になります
- もっと読む
コメントを書く