はじめに
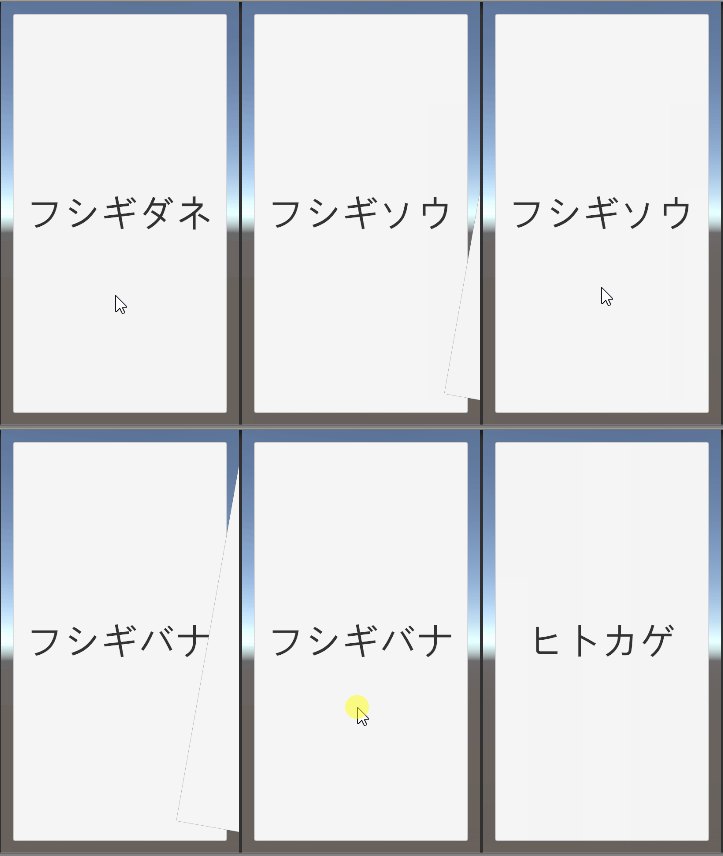
「Unity-SwipeableView」を Unity プロジェクトに導入することで
Tinder のような UI を実装できるようになります
使用例(引用)


使い方
public class CardData
{
    public string m_text;

    public CardData( string text )
    {
        m_text = text;
    }
}
カードに表示するデータを管理するクラスを定義します
using SwipeableView;
using UnityEngine;
using UnityEngine.UI;

public class CardUI : UISwipeableCard<CardData>
{
    public CanvasGroup  m_groupUI;
    public Text         m_textUI;

    public override void UpdateContent( CardData data )
    {
        m_textUI.text = data.m_text;
    }

    public override void SwipingToRight( float rate )
    {
        m_groupUI.alpha = 1 - rate;
    }

    public override void SwipingToLeft( float rate )
    {
        m_groupUI.alpha = 1 - rate;
    }
}
UISwipeableCard クラスを継承して
カードの UI を制御するコンポーネントを定義します
using SwipeableView;
using System.Collections.Generic;

public class ViewUI : UISwipeableView<CardData>
{
    public void UpdateData( List<CardData> data )
    {
        base.Initialize( data );
    }
}
UISwipeableView クラスを継承して
ビューを制御するコンポーネントを定義します
using SwipeableView;
using System.Collections.Generic;
using UnityEngine;

public class Example : MonoBehaviour
{
    public ViewUI m_viewUI;

    private void Start()
    {
        var list = new List<CardData>
        {
            new CardData( "フシギダネ"  ),
            new CardData( "フシギソウ"  ),
            new CardData( "フシギバナ"  ),
            new CardData( "ヒトカゲ"    ),
            new CardData( "リザード"    ),
            new CardData( "リザードン"  ),
            new CardData( "ゼニガメ"    ),
            new CardData( "カメール"    ),
            new CardData( "カメックス"  ),
        };

        m_viewUI.UpdateData( list );
    }

    private void Update()
    {
        if ( Input.GetKeyDown( KeyCode.LeftArrow ) )
        {
            m_viewUI.AutoSwipeTo( Direction.Left );
        }
        else if ( Input.GetKeyDown( KeyCode.LeftArrow ) )
        {
            m_viewUI.AutoSwipeTo( Direction.Right );
        }
    }
}
定義したビューを操作するクラスを作成します

カードの UI を作成してプレハブ化して、
カードの UI を制御するコンポーネントをアタッチします

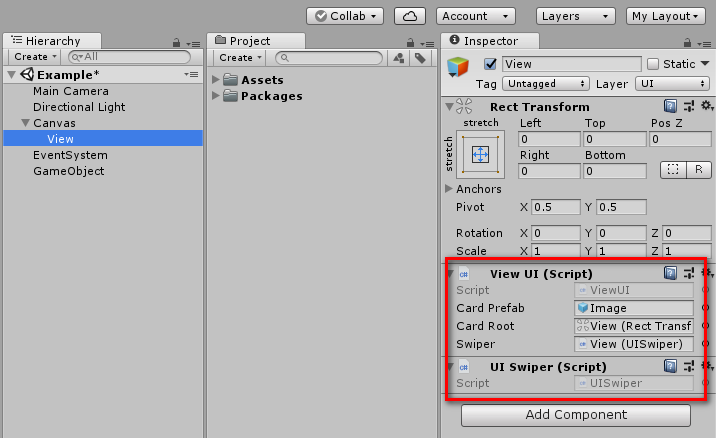
ビューの UI を作成して、ビューを制御するコンポーネントと
「UISwiper」をアタッチします

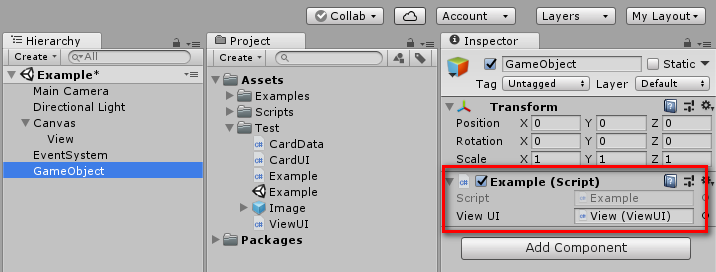
空のゲームオブジェクトにビューを操作するコンポーネントをアタッチします

これで Tider のような UI を実装できます
- もっと読む
コメントを書く