目次
プロジェクトの作成
最初に、2D アクションゲーム用の Unity プロジェクトを準備します

Unity を起動して上記の画面が表示されたら、「New」を選択します

「Project name」に「Platformer」と入力します
次に「Location」の「…」を押して、プロジェクトの保存場所を選択します
そして、「2D」をチェックして、「Create project」ボタンを押します
これで、「Platformer」という名前で
2Dのゲームを開発するためのプロジェクトの準備が完了しました
スクリプトの作成
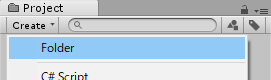
Project ビューの「Create>Folder」を選択します
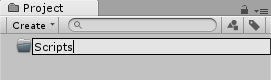
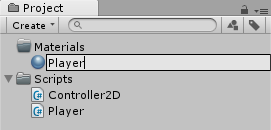
作成したフォルダに「Scripts」と名前を付けます
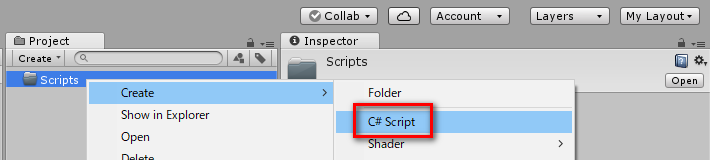
作成した「Scripts」フォルダを右クリックして「Create>C# Script」を選択します
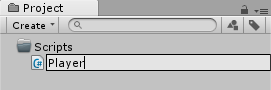
作成したスクリプトに「Player」と名前を付けます
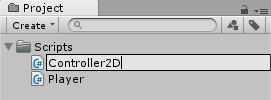
もう1つスクリプトを作成して「Controller2D」と名前を付けます
作成したスクリプトをダブルクリックすると、
お使いの環境に合わせて Visual Studio や MonoDevelop などの、
プログラムを書くためのエディタが起動するので、
下記のプログラムをコピーして貼り付けます
Player.cs
using UnityEngine;
using System.Collections;

[RequireComponent (typeof (Controller2D))]
public class Player : MonoBehaviour {


    Controller2D controller;

    void Start() {
        controller = GetComponent<Controller2D> ();
    }
}
Controller2D.cs
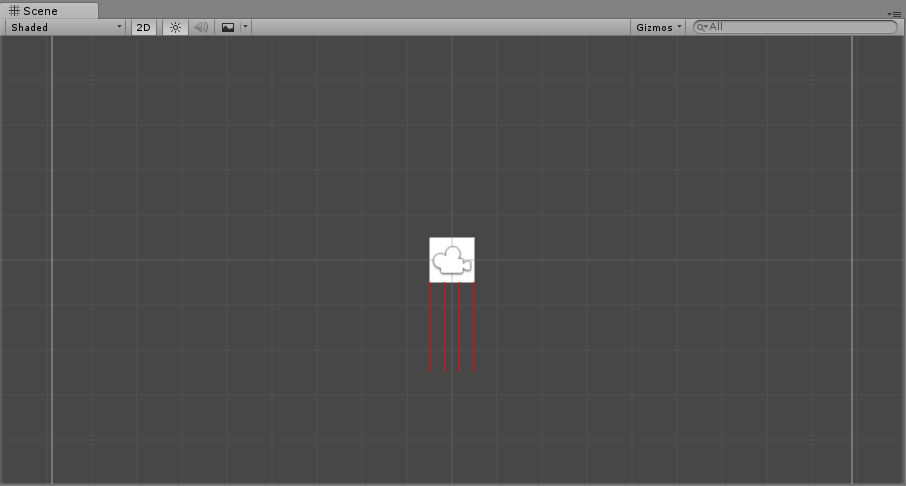
using UnityEngine;
using System.Collections;

[RequireComponent (typeof (BoxCollider2D))]
public class Controller2D : MonoBehaviour {

    const float skinWidth = .015f;
    public int horizontalRayCount = 4;
    public int verticalRayCount = 4;

    float horizontalRaySpacing;
    float verticalRaySpacing;

    BoxCollider2D collider;
    RaycastOrigins raycastOrigins;

    void Start() {
        collider = GetComponent<BoxCollider2D> ();
    }

    void Update() {
        UpdateRaycastOrigins ();
        CalculateRaySpacing ();

        for (int i = 0; i < verticalRayCount; i ++) {
            Debug.DrawRay(raycastOrigins.bottomLeft + Vector2.right * verticalRaySpacing * i, Vector2.up * -2,Color.red);
        }
    }

    void UpdateRaycastOrigins() {
        Bounds bounds = collider.bounds;
        bounds.Expand (skinWidth * -2);

        raycastOrigins.bottomLeft = new Vector2 (bounds.min.x, bounds.min.y);
        raycastOrigins.bottomRight = new Vector2 (bounds.max.x, bounds.min.y);
        raycastOrigins.topLeft = new Vector2 (bounds.min.x, bounds.max.y);
        raycastOrigins.topRight = new Vector2 (bounds.max.x, bounds.max.y);
    }

    void CalculateRaySpacing() {
        Bounds bounds = collider.bounds;
        bounds.Expand (skinWidth * -2);

        horizontalRayCount = Mathf.Clamp (horizontalRayCount, 2, int.MaxValue);
        verticalRayCount = Mathf.Clamp (verticalRayCount, 2, int.MaxValue);

        horizontalRaySpacing = bounds.size.y / (horizontalRayCount - 1);
        verticalRaySpacing = bounds.size.x / (verticalRayCount - 1);
    }

    struct RaycastOrigins {
        public Vector2 topLeft, topRight;
        public Vector2 bottomLeft, bottomRight;
    }

}
プレイヤーの配置
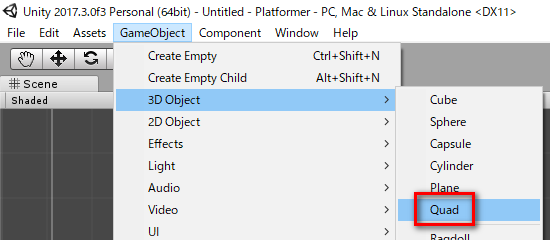
Unity メニューの「GameObject>3D Object>Quad」を選択します
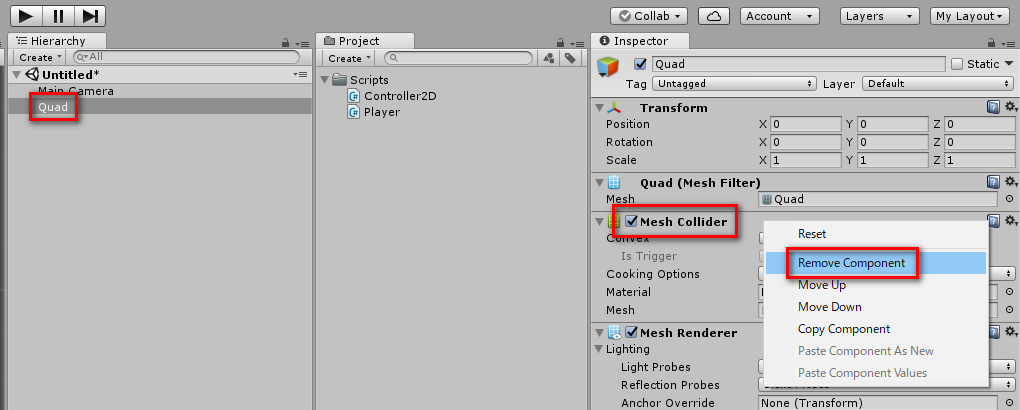
作成した「Quad」を選択して、「Mesh Collider」を右クリックして
「Remove Component」を選択します
Project ビューの「Create>Folder」を選択します

作成したフォルダに「Materials」と名前を付けます
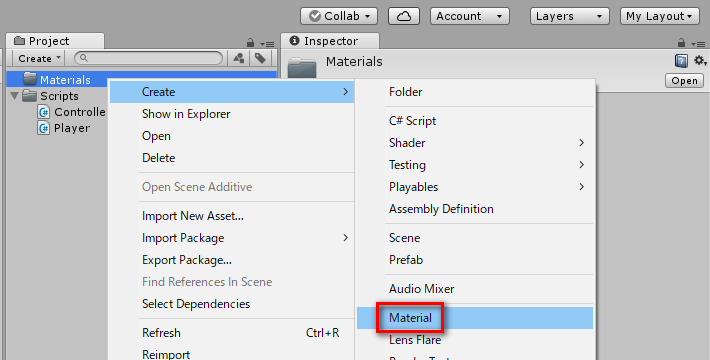
作成した「Materials」フォルダを右クリックして
「Create>Material」を選択します
作成したマテリアルに「Player」と名前を付けます
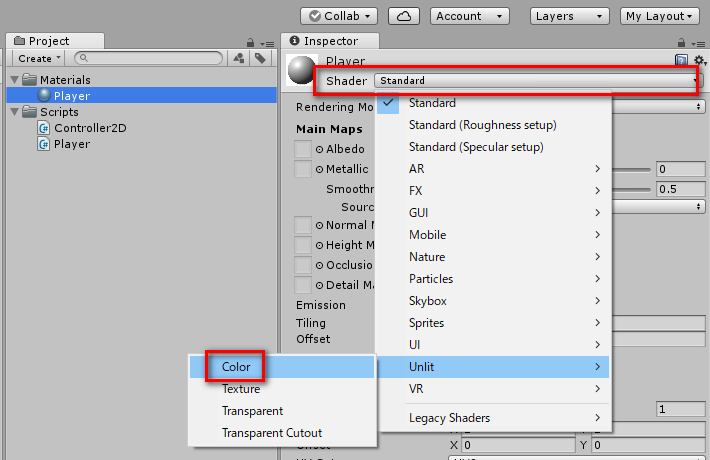
作成した「Player」マテリアルを選択して
「Shader」のプルダウンメニューから「Unlit>Color」を選択します
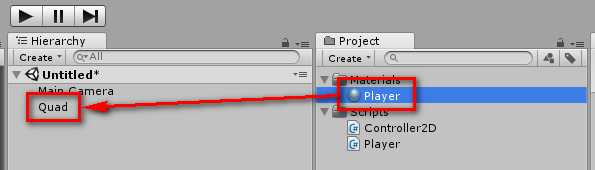
「Player」マテリアルを「Quad」オブジェクトにドラッグします
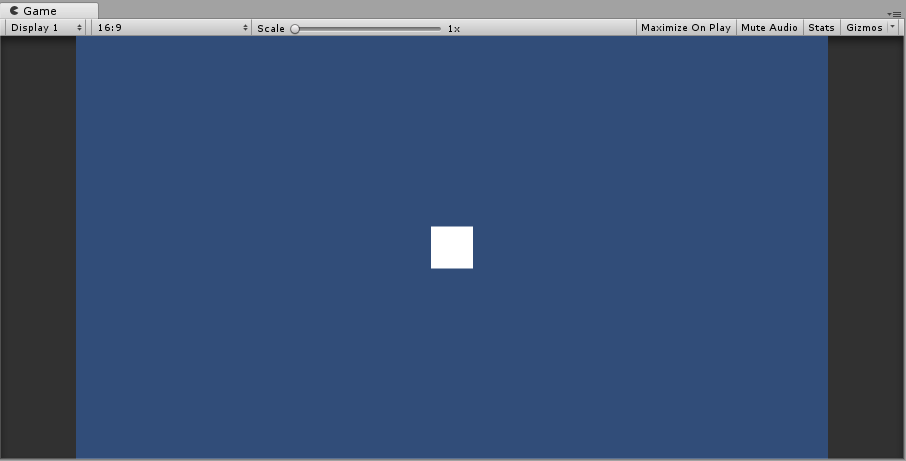
プレイヤーオブジェクトが白色になっていれば反映成功です
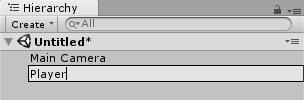
「Quad」オブジェクトを選択した状態で F2 を押して
「Player」という名前に変更します
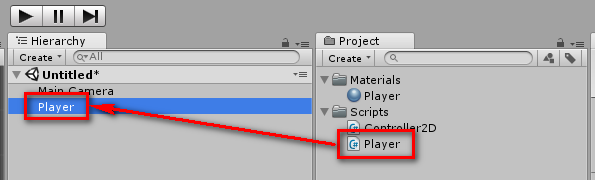
先ほど作成した「Player」スクリプトを「Player」オブジェクトにドラッグします
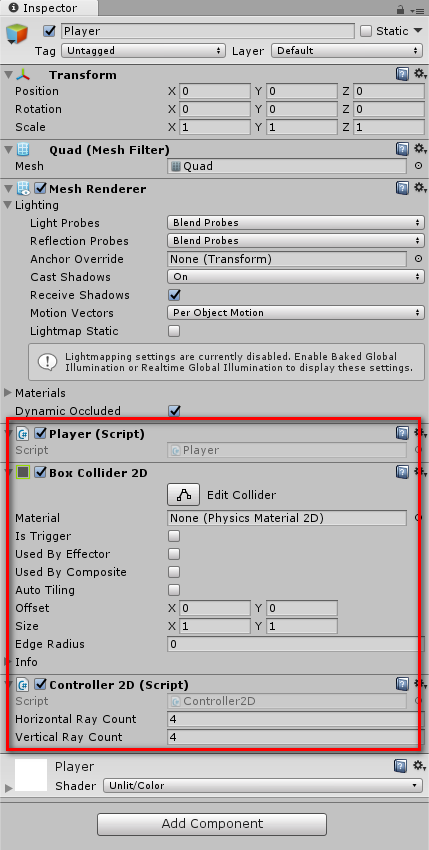
「Player (Script)」「Box Collider 2D」
「Controller 2D (Script)」が設定されていれば反映成功です
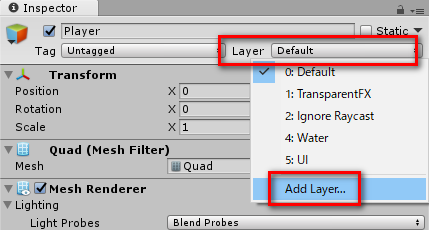
「Player」オブジェクトを選択して「Layer」のプルダウンメニューから
「Add Layer...」を選択します
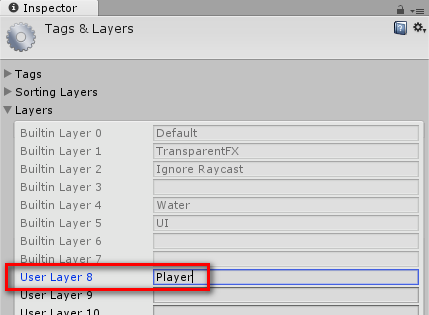
「Layers」を開いて「User Layer 8」に「Player」と入力します
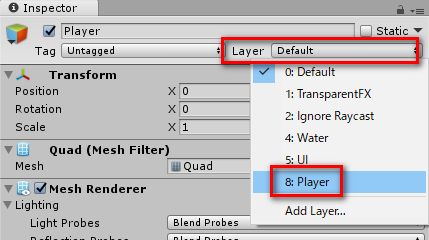
もう一度「Player」オブジェクトを選択して
「Layer」のプルダウンメニューから「Player」を選択します
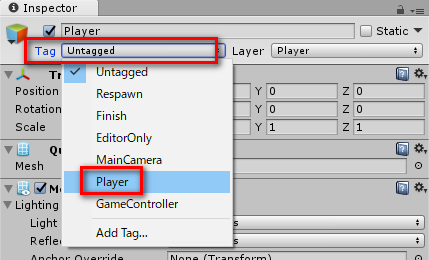
次に「Tag」のプルダウンメニューから「Player」を選択します
これで、プレイヤーオブジェクトの準備が完了です
シーンの保存

Unity メニューの「File>Save Scenes」を選択するか、Ctrl + S を押します
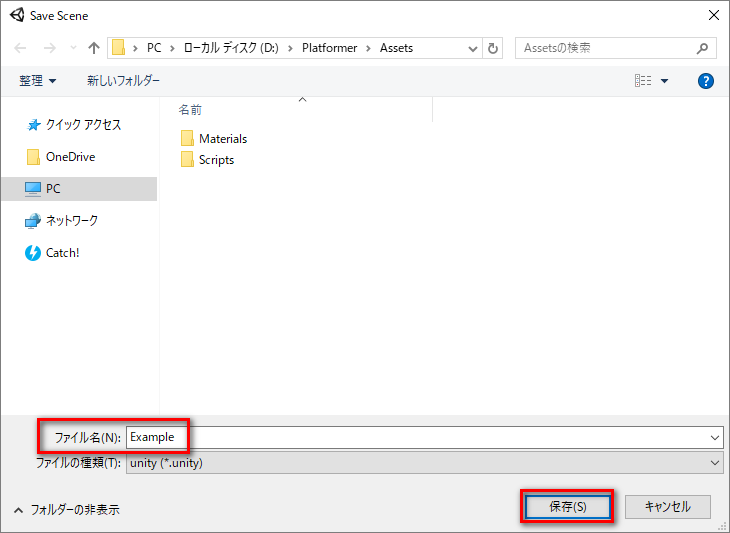
「ファイル名」に「Example」と入力して「保存」ボタンを押します
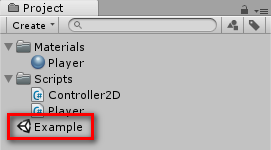
Project ビューに Unity アイコンの「Example」というファイルが作成されていれば
シーンの保存が完了です
- もっと読む
コメントを書く